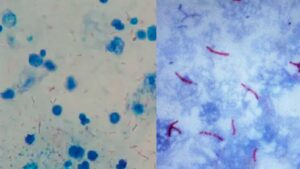
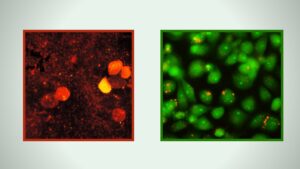
Negative staining is a method used to visualize viruses and other small particles under a microscope. In this method, a drop of the sample is placed on a flat surface and a small amount of a negatively charged stain is added to the sample. The stain surrounds the virus particle, but does not adhere to it, creating a clear halo around the particle. The contrast between the stain and the unstained background allows the virus particle to be seen more clearly. This method is particularly useful for imaging small, poorly contrast-enhancing particles, such as viruses, and can be used to observe the shape, size, and surface features of the particle.
What is the Negative staining of Viruses?
- The purpose of staining is to highlight differences when viewed under a microscope. Viruses are stained so that they stand out more clearly against their backgrounds.
- When an electron microscope is used, more electrons are concentrated on the stain. One of the best methods for examining viral and bacterial shapes is negative staining.
- In the process of negative staining, the background is stained while the virus itself remains untreated. This means the stain can be seen all the way around the viral particle, outlining its shape, and can even seep into the virus’s tiny protrusions, elaborating on its physiology.
- Damages to the virus’s exterior that allow the stain access can be seen, and the stain itself may show some of the virus’s internal structure.
- Heavy metallic stains and support films are used for negative staining.
- Plastic support films become hydrophobic over time and need regular cleaning to maintain their effectiveness, while thin carbon films can be evaporated onto the surface of freshly cleaved mica (a sheet of metallic metal) using high temperatures and a vacuum to produce superior results.
- Staining with heavy metals obscures the viruses’ images.
- Because platinum is such a heavy metal, only the coated side and the shadowed areas seem dark in pictures, while the coated side scatters electrons and appears light in visualisation.
- The specimen casts a shadow that looks like a light is shining on it.
What is the Objective of Negative Staining of Viruses?
The main objective of negative staining of viruses is to visualize the physical characteristics of virus particles, including:
- Size and shape: Negative staining allows for the determination of the size and shape of the virus particle, which can be useful for identifying different types of viruses.
- Surface features: The stain used in negative staining can highlight the surface features of the virus, such as spikes or bumps, which can be used to further differentiate between different types of viruses.
- Presence and number of particles: Negative staining can also be used to determine the presence and number of virus particles in a sample, which can be useful for quantifying the amount of virus in a sample.
Overall, negative staining of viruses is an important tool in virology for characterizing and studying the physical properties of virus particles, which can provide insight into their behavior, replication, and potential interactions with host cells.
Principle of Negative Staining of Viruses
The specimen or sample is placed on a support film for negative staining of viruses. Samples are applied to the carbon support film at low concentrations, typically between 0.05 and 0.1 mg ml -1, while a dosage of 1 mg ml-1 is recommended for complete virus particles such adenoviruses and influenza viruses. When the specimen is inundated with a heavy metal salt and then allowed to air dry, the stain dries around the molecules of the material.
Assembled on a film for stability, the specimen (specimen holder). Carbon-film is more popular than plastic film because it produces superior outcomes. Hydrophobicity is an exterior property of the carbon layer, while cleanliness and hydrophilicity characterise its interface. Between the carbon film and the mica layer, the sample is sucked in.
Once the carbon film has absorbed the sample, it is floated in a pool of negative stain, such as uranyl acetate, ammonium molybdate, or sodium silicotungstate. Floating carbon film is dyed, then a copper grid is laid on top. The grid can be removed from the satin pool by laying small pieces of paper on it; once the paper is wet, it can be lifted, bringing the grid and carbon film with it.
A paper-grid-carbon-sample sandwich is formed due to the carbon films protruding from the margins of the copper grid and forming carbon layers with the stain. Once the sandwich complex has been blotted and allowed to air dry, it is ready to be viewed under an electron microscope. Transmission electron microscopy is typically employed when visualising viruses and their components because it provides the highest resolution and produces the most accurate colour image.
To electrons, the molecules will seem transparent, but the gaps between them will be darker. Fixation, dehydration, sectioning, and staining are necessary steps in preparing samples for observation and development of a quality image of the sample when using a Transmission electron Microscope. The result is a vividly hued representation of the specimen.
Negative Stains Used for Virus
SODIUM (POTASSIUM) PHOSPHOTUNGSTATE (PTA)
PTA is one of the most widely utilised negative stains, despite having a profoundly disruptive effect on many membrane systems. PTA is not a fixative and can eliminate certain infections. It is also known to interact with lipoproteins and cause “myelin figures” to develop. However, it can be utilised at physiological pH and is less prone to precipitate in the presence of salts and biological medium.
NEUTRAL PHOSPHOTUNGSTIC ACID
A 1-3-percent solution of neutral PTA (buffered to pH 7 with sodium hydroxide) is a useful stain for a variety of materials, but it is particularly effective for dissociating viruses. Uranyl acetate generates more contrast than the stain.
URANYL ACETATE
A 1% to 3% uranyl acetate solution diluted in distilled water (pH 4.2 to 4.5) can be used to adversely stain a variety of sample types. The stain should be filtered through a 0.22 m filter that has been thoroughly pre-rinsed with double-distilled water. The filtered stain should be kept in the dark at 4 degrees Celsius for more than one year.
Uranyl acetate solutions also serve as a viral fixative. Uranyl acetate and uranyl formate have the advantage of producing the highest electron density and picture contrast, in addition to giving a fine grain to the image. For smaller particle materials, the finer-grained image created is especially helpful. Since the pH of the stain is low, it is not suggested for use with acid-sensitive specimens. In addition, the stain precipitates at physiological pH and in the presence of several salts, necessitating extreme caution when applying it.
SODIUM SILICOTUNGSTATE
Sodium silicotungstate (1-5%) provides strong contrast and is also beneficial because it forms a particularly fine grain, making it suitable for minute particles and single molecules.
AMMONIUM MOLYBDATE
Used as a 1-2% solution in distilled water with ammonium or sodium hydroxide to adjust the pH to 7.0. Do not exceed a pH of 7 as crystallisation may develop during drying if the pH is over 7. A 2% ammonium molybdate solution is especially beneficial for labelling osmotically sensitive organelles. Despite producing a lower electron density than other stains, this negative stain appears to yield the best results for numerous specimen types. This stain has also been used to negatively stain thin cryosections of preserved cells that have been thawed.
METHYLAMINE TUNGSTATE
Utilized as a 2% solution in pure water (usually pH 6.5). Methylamine tungstate solutions are not stable, thus it is recommended to prepare modest amounts of stain prior to each experiment. This stain is excellent for negatively staining macromolecules, viruses, and membranes, as it does not cause as much harm to sensitive structures as PTA. Contrast is not as high as with uranyl acetate, but resolution is high and the substance effectively wets grid film and specimens.
OTHER STAINS
Gold thioglucose, lanthanum acetate, lithium tungstate, sodium zirconium glycollate, tungstoborate, uranyl acetate, aluminium formate, uranyl formate, uranyl oxalate, and uranyl sulphate are additional less common stains.
How to Prepare the Viral samples for Visualization under a Transmission Microscope?
Viral samples are essential in understanding the structure and behavior of viruses. Staining and visualization techniques under a Transmission Microscope are crucial for researchers to obtain high-resolution images of the viral particles. In this section, we’ll discuss the preparation of viral samples for staining and visualization using two heavy metallic salts: uranyl acetate and sodium silicotungstate, and ammonium molybdate.
- Uranyl Acetate for Staining Enveloped Viruses: Uranyl acetate, a low pH compound containing uranium, is widely used to stain enveloped viruses. It binds to the negatively charged lipid envelope heads to stabilize the viral membrane, producing a superimposed image of the surface of the support film and the opposite side of the viral particle. However, uranyl acetate may react with nucleic acids, proteins, and lipids, resulting in a positive stain instead of a negative stain, and it can also be radioactive.
- Sodium Silicotungstate for Visualizing Small Viral Proteins: Sodium silicotungstate, which contains tungstenium and silicotungstic acid, is a neutral pH, chemically inert stain. It binds closely to the support film and outlines the morphological and physiological features of the virus that are bound to the film, including the viral proteins. But, the stain produces a large stained molecule, making visualization difficult, limiting the image resolution.
- Ammonium Molybdate for Visualizing Large Viral Particles: Ammonium molybdate, with a neutral pH, holds firmly to the support film after drying, making it ideal for visualizing large viral particles such as orthomyxoviruses. It offers high contrast compared to other stains under microscopy and can only show the outer part of the particles, which is advantageous for negative staining.
Materials and reagents required
- EM grid-grade tweezers (2 or more pairs)
- ultra-purified water (e.g. Milli-Q water)
- uranyl acetate
- 0.02 µm syringe filter and syringe (3-5 ml)
- petri dish
- stir plate
- 4x 2 ml microcentrifuge tubes with screw caps
- waste container for uranyl acetate
- 4 ml plastic culture tube with cap
- small stir bar
- filter paper (cut into wedges)
- timer
- lab coat, respiratory protection (mask), eye protection
- Uracyl acetate: Prepare 2% uranyl acetate by mixing 0.04 g uranyl acetate and 2 ml ultra-purified water.
Procedure Negative staining of Viruses on a Grid using Uranyl Acetate
Step-by-Step Guide to Preparing Uranyl Acetate Solution:
- Mixing the Sample: Start by preparing 2ml of 2% uracyl acetate solution using ultra-purified water in a 4ml tube. Stir the solution for approximately 30 minutes to 1 hour to ensure proper mixing.
- Filtering the Solution: Use a 0.02 µm syringe filter to remove any undissolved particles from the uracyl acetate solution. Transfer the filtered solution into a 2 ml screw-cap tube.
Staining the Grid:
- Preparing the Grid: Hold the electron microscope grid in Electron Microscope grid-grade tweezers.
- Adding Uranyl Acetate: Using a pipette, add three drops of uranyl acetate to the shiny side of the grid. Allow the stain to run off and waste any excess solution into a waste container. Repeat the process by adding another drop of uranyl acetate to the shiny side and let it sit for 45 seconds.
- Wicking Away the Stain: Take a filter paper and wet its wedge with ultra-purified water. Use the wet wedge of the filter paper to wick away the stain from the grid, leaving a thin sheen of stain on the grid.
- Drying the Grid: Set the tweezers with the grid on a dry petri dish, away from any objects, and allow it to dry for about 1 hour.
- Observing Under Electron Microscope: Once the grid has dried, it is ready to be observed under the electron microscope.
Note: Uranyl acetate powder is hazardous; use a lab coat, goggles, a face mask, and gloves when working with it. If there is too much stain on the grid, all you will see in the TEM is stain; if there is too little stain on the grid, your viruses won’t be negatively stained.
Results and Interpretation
- Comparing electron micrographs of various viruses reveals that each virus has unique characteristics.
- Long fibres ranging from 120 to 350 kDa with penton bases of around 300 kDa are characteristic of the Adenovirus, for instance.
- Along with their shape, orthomyxoviruses exhibit spiky surfaces.
- Depending on the sample, rotaviruses may or may not exhibit compact, many viral particles.
Other Methods of Negative staining of Viruses
Method A
Single-droplet method I
- Prepare a 2% solution of the stain in water (and adjust the pH to 7.0 with 1M KOH, if required).
- Mix equal amounts of sample and stain (10-20 µl of each is sufficient).
- Place a drop of this solution on a formvar grid while holding it with tweezers. After ~20 seconds, remove nearly all of the solution with filter paper.
- Air dry. Some procedures recommend a post-drying rinse in distilled water. In reality, this is typically only required when utilising a buffer that crystallises when dried or when the material is too thick for the grid. If this is the case, the grid must be re-dried before viewing.
Single-droplet method II
- Prior to use, glow discharge formvar-carbon-coated grids to improve their hydrophylicity.
- Place 1-3 µl of the specimen on the grid (This is sufficient to cover the grid surface).
- After ~10 seconds, slowly pipette 20 µl of stain onto the sample while using a wedge of filter paper to absorb the stain from the other side. The staining process must take between ~30 and 60 seconds.
- After the grid has absorbed as much of the stain as possible, allow it to dry and check it as soon as possible, preferably the same day. If there are issues with stain precipitation or general stain background, pre-staining rinsing may be required (see below).
Method B
- Sequential dual-droplet technique
- Particles or organelles are suspended in a suitable buffer or in distilled water.
Place a small amount (5-10 µl) of the suspension on a formvar grid. - After the suspension has partially dried, the grid is washed by contacting it three times with a drop of distilled water on its surface.
- Remove excess water by pressing the grid against filter paper.
- Then, a small drop of stain is placed on the grid.
- The extra stain is removed after 10 seconds by rubbing the edge to a filter paper.
- The grid should be dried at room temperature.
Method C
The Harvard laboratory of Tim Mitchison discovered that this basic negative staining method works well with a variety of specimens when there is an abundance of salt or sucrose/glycerol in the buffer and sample washing is necessary.
Prior to applying stain, there are numerous methods for scrubbing the grid surface. Apply sample to the grid, allow adsorption for ~10 seconds, then hold the grid at a downward angle and drop 2-3 large drops of rinse solution (either ddH2O + 5 mM EGTA for removing interfering salts/buffer components/sucrose/glycerol or warm BRB80 for removing unpolymerized tubulin) over it, and then apply the stain. Washing can also be accomplished by laying the grid sample-side down on a series of big droplets of rinse solution or by slowly dragging the grid sample-side down over the surface of a large droplet of rinse solution. The stain can then be applied as described previously. Longer adsorption durations can be used to concentrate dilute samples on the grid (1-3 min).
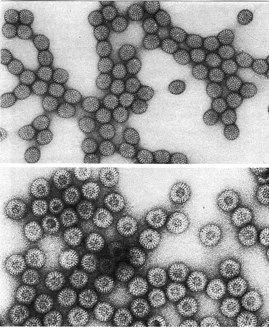
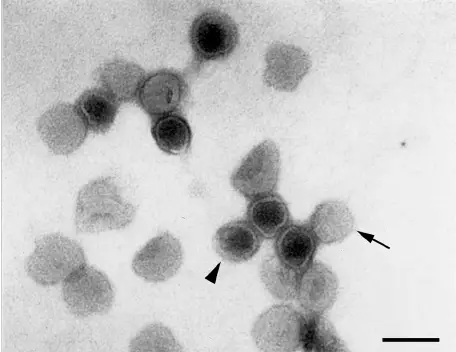
Pictures of Negative staining of Viruses

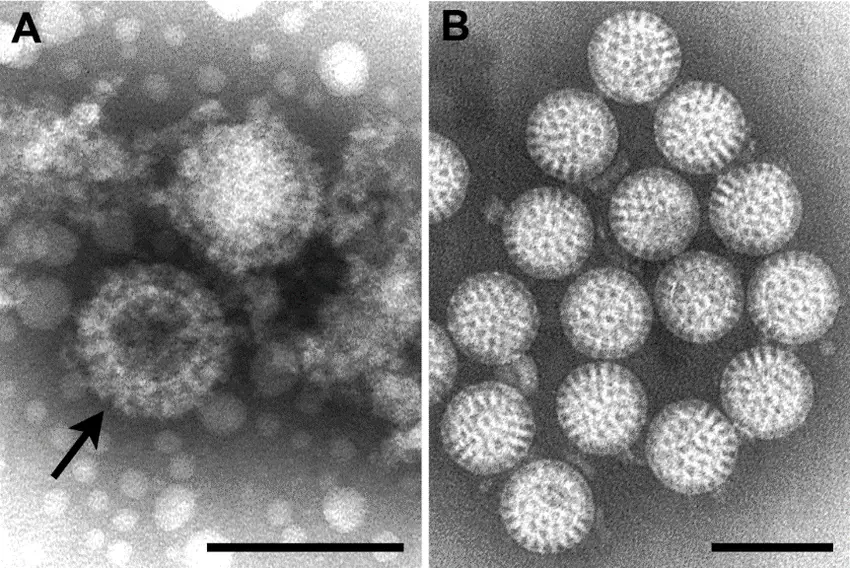
Advantages of Negative Staining of Viruses
- High contrast imaging: Negative staining provides a high-contrast image of the virus, which allows for clear visualization of the virus’s morphology and structural features.
- Improved Resolution: Negative staining helps to increase the resolution of the image as the stain does not obscure the virus’s fine details, making it easier to identify the virus’s specific features.
- Non-destructive: Negative staining is a non-destructive technique, which means that the virus remains intact and can be used for further studies.
- Easy to perform: Negative staining is a relatively simple technique that can be performed in a laboratory with basic equipment.
- Special Equipment: To carry out, you need no specialised tools.
- Oligomeric state: The oligomeric state of the tiny viral proteins can be quickly determined and visualised via negative staining.
Limitations of Negative Staining of Viruses
- Limited visualization: The negative staining technique only provides a visual representation of the virus’s outer layer, and its inner structures may not be visible.
- Limited specificity: Negative staining may not be specific for certain viruses and can stain other cellular components, leading to incorrect results.
- Limited accuracy: The accuracy of negative staining can be limited as it depends on the quality of the stain and the drying conditions of the grid.
- Time-consuming: Negative staining can be time-consuming, as the process requires multiple steps and drying times, which can take several hours.
- Other: Exposure to air drying can cause delicate specimens, such as encapsulated viruses, to flatten and squeeze out lipid blebs. Adsorption is complicated by conformational changes brought on by the molecular forces at play, which can lead to things like the physiological shrinkage of the virus and the rigidification/compaction of lipids, both of which obscure the image.
Applications of Negative Staining
Negative Staining has a wide range of applications in the field of virology, some of which include:
- Virus Identification: Negative staining is used to identify the type of virus present in a sample, by observing its morphological and structural features.
- Virus Research: Negative staining is commonly used in virus research to study the structure of viruses and how they interact with host cells.
- Diagnosis: Negative staining can be used as a diagnostic tool to detect the presence of viruses in clinical samples, such as blood or saliva, and help to diagnose viral infections.
- Quality Control: Negative staining is used in the quality control of vaccines and antiviral drugs, to ensure that the vaccine or drug particles are properly formed and free of contaminants.
- Environmental Monitoring: Negative staining can be used to monitor the presence of viruses in environmental samples, such as water or air, and assess the risk of viral infections.
- Electron Microscopy: Negative staining is an essential technique in Electron Microscopy and provides a visual representation of the virus under the electron microscope.
FAQ
What is Negative Staining?
Negative staining is a technique used to visualize viruses under an electron microscope. In negative staining, a heavy metal salt such as uranyl acetate or sodium silicotungstate is applied to a grid containing the virus specimen, which is then observed under the electron microscope.
Why is it called Negative Staining?
The term “negative staining” refers to the fact that the stain is applied to the outside of the virus particles, which creates a negative contrast with the background. This allows the virus particles to be easily visualized and studied.
What materials are needed for Negative Staining?
Materials required for negative staining include Electron Microscope grids, a heavy metal salt such as uranyl acetate or sodium silicotungstate, a filter paper, ultra-purified water, a pipette, and tweezers.
How is Negative Staining performed?
Negative staining is performed by adding a drop of the heavy metal salt onto the grid containing the virus specimen and allowing it to sit for 45 seconds. The stain is then removed using a filter paper, leaving a thin sheen of the stain on the grid. The grid is then left to dry for 1 hour and observed under an electron microscope.
What are the advantages of Negative Staining?
Negative staining provides high contrast images under the electron microscope and can be used to identify the type of virus present in a sample. Negative staining is also useful in research and can help to study the structure of viruses and how they interact with host cells.
What are the limitations of Negative Staining?
One of the limitations of negative staining is that it can react with nucleic acids, proteins, and lipids, which may cause a positive stain result instead of a negative stain. Additionally, uranyl acetate, which is commonly used as a stain, is radioactive.
Is Negative Staining a reliable method for virus visualization?
Yes, negative staining is a reliable method for virus visualization, especially in the field of virology. It provides high contrast images under the electron microscope and is commonly used in virus research and diagnosis.
Can Negative Staining be used in clinical settings?
Yes, negative staining can be used in clinical settings as a diagnostic tool to detect the presence of viruses in clinical samples, such as blood or saliva, and help diagnose viral infections.
How does Negative Staining compare to other methods for virus visualization?
Negative staining is an effective method for virus visualization and offers high contrast compared to other methods, such as immunofluorescence. However, other methods such as transmission electron microscopy provide a more detailed view of the virus and its internal structure.
Is Negative Staining a safe method for virus visualization?
Negative staining is generally considered safe, however, uranyl acetate, which is commonly used as a stain, is radioactive and must be handled with care. Other heavy metal salts used for negative staining, such as sodium silicotungstate, are considered chemically inert and safe to handle.
References
- Microbiology by Prescott, 5th Edition
- https://microbenotes.com/negative-staining-of-viruses/
- https://www.sciencedirect.com/science/article/pii/B9780128012383025630
- https://www.intechopen.com/books/microbiology-in-agriculture-and-human-health/negative-and-positive-staining-in-transmission-electron-microscopy-for-virus-diagnosis
- http://web.path.ox.ac.uk/~bioimaging/bitm/instructions_and_information/em/neg_stain.pdf
- https://experiments.springernature.com/articles/10.1007/978-1-59745-294-6_7
- https://cpb-us-west-2-juc1ugur1qwqqqo4.stackpathdns.com/u.osu.edu/dist/e/20087/files/2015/08/Positive_and_Negative_Stainging_of_Viruses_on_TEM_Grids-239c21p.pdf
- https://en.wikipedia.org/wiki/Negative_stain
