What is Fluorescence Microscopy?
A fluorescence microscope is an optical microscope that employs fluorescence for examining specific properties of select organic and inorganic substances. A fluorescence microscope functions by observing labeled samples; the labels here are the specific fluorescent molecules (or clusters of molecules)—termed fluorophores—that emit light when stimulated at specific frequencies.
Components of a fluorescence microscope include a light source (typically high-intensity lamps, lasers, or LEDs), excitation filters, a dichroic mirror, and emission filters. The light source provides the stimulation light needed to view a specimen. The excitation and emission filters allow for wavelength specificity. The dichroic mirror directs the stimulation light onto the specimen (it reflects it onto the specimen) but allows the emitted light to filter through to the detector.
Why is fluorescence microscopy such a universally important technique in so many scientific fields? Because it enables selective tagging and the ability to visualize exactly what’s going on in the chaotic assembly that is a biological entity with so many moving features. For instance, if the molecule of interest can be conjugated to a fluorophore, one can determine where it exists in context to the cell, how it moves with respect to other entities, how it changes shape over time and space due to specific stimulation—none of which would be able to be assessed without conventional microscopy.
Fluorescence microscopy has applications across the board. For instance, fluorescence microscopy is used in the analysis of diagnostic antibodies and antigen expression in tissue sections in biomedical research, as well as localization studies for proteins and nucleic acids in certain parts of the cell. Less extensively, microbiology, neuroscience, and developmental biology rely on fluorescence microscopy to better understand localization and organizational phenomena.
The history of fluorescence microscopy spans more than a century. For example, in 1852, British scientist Sir George G. Stokes officially identified fluorescence and observed the Stokes shift (the change in emission spectrum to longer wavelengths). In the twentieth century, August Köhler and Carl Reichert observed fluorescence while using optical microscopes and, a bit later, ultraviolet microscopes (albeit initially as an undesired feature). Yet throughout the following decades, subsequent developments in fluorescent dyes and alternative light sources validated fluorescence microscopy as a lasting path for scientific exploration.
Types of Fluorescence Microscopes
There are many forms of fluorescence microscopy as some transpire in different years and some have different advantages. These include:
- Wide-Field Epifluorescence Microscopy- the most standard form of fluorescence microscopy. This technique uses a uniform approach to excite the entire specimen at the excitation wavelength, and those regions of the specimen that fluoresce accept the initial wavelength and re-emit at the emission wavelength.
- Confocal Fluorescence Microscopy—Uses point illumination and spatial pinholes to eliminate out of focus light during imaging. Produces optical sectioning as the image is reconstructed by scanning the sample in a step-wise fashion. Increased resolution and contrast by using for more substantial samples.
- Total Internal Reflection Fluorescence (TIRF) Microscopy- TIRF excites fluorophores in a very specific plane relative to the glass-water interface, on the order of ~100 nm from the cell membrane. Therefore, this technique is good for studying anything at the cell surface and effective for membrane dynamics and cell-substrate interactions.
- Two Photon (Multiphoton) Microscopy- Two photon microscopy utilizes near-infrared light which only excites fluorophores at the focal point; therefore, antagonistic photodamage is minimized and one can see deeper into live tissue. This technique is applicable for intravital imaging of dynamic processes.
- Fluorescence-Lifetime Imaging Microscopy (FLIM) – FLIM measures the decay time of emitted fluorescence of fluorophores, rendering information about the localization of the fluorophores’ environment (pH, ion concentrations). Therefore, it helps determine compound interactions and the overall biochemical state of the cells.
Principle of Fluorescence Microscope – How does fluorescence microscopy work?
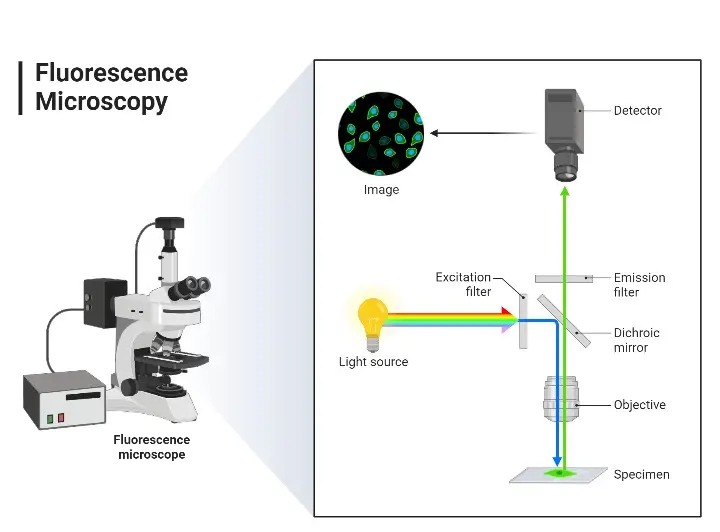
The fluorescence microscope is based on fluorescence. The sample’s molecules of interest are stained with fluorescent dyes (or fluorophores), and upon exposure to light of one wavelength, the fluorophore absorbs energy and emits it at a longer wavelength. The emitted light that passes through is combined to create the image of the sample. The first step in this entire procedure is specimen preparation with appropriate fluorescent stains. A light source (mercury vapor lamp or laser) generates white light which passes through an excitation filter.
The excitation filter creates the specific wavelength needed for exciting certain fluorophores present in the specimen. Next, the light travels through a dichroic mirror, which upon receiving the wavelength from the excitation filter, reflects it downwards toward the specimen through the objective lens. The excitation light strikes the specimen, exciting the fluorophores which then emit wavelengths of light at longer colors. This occurs in reverse fashion as the light travels back up through the objective lens to the dichroic mirror.
The dichroic mirror allows the longer wavelength emitted light to travel up and continue while reflecting excess excitation wavelength light back downward. After the dichroic mirror, however, the emitted light strikes an emission filter which serves to further discriminate the longer excitation wavelengths so that only emitted wavelengths driven by fluorophores can be seen in the eyepiece or detector. Thus, the result is a brightly colored fluorescent specimen against a dark background.
The fact that researchers can obtain such resolution and differentiation means that they are essentially creating their own version of reality from what is essentially biological white noise. By marking particular molecules with the studied fluorophores, they discover where those molecules reside, how they interact with others and themselves over time—and in real time—acquiring information that would otherwise go unnoticed by the human eye and standard microscopy.
Parts of Fluorescence Microscope
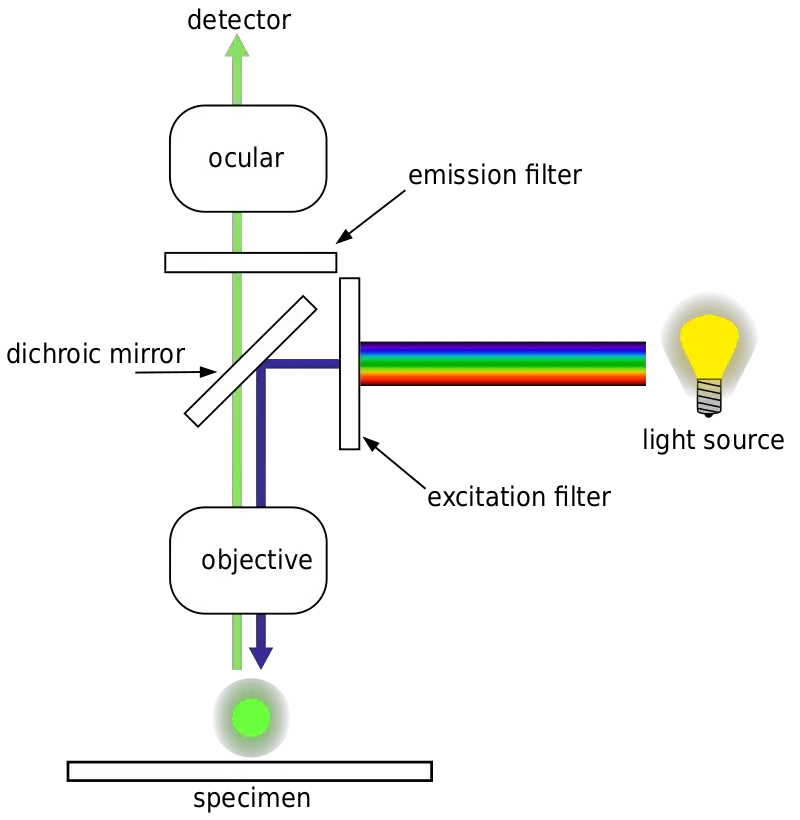
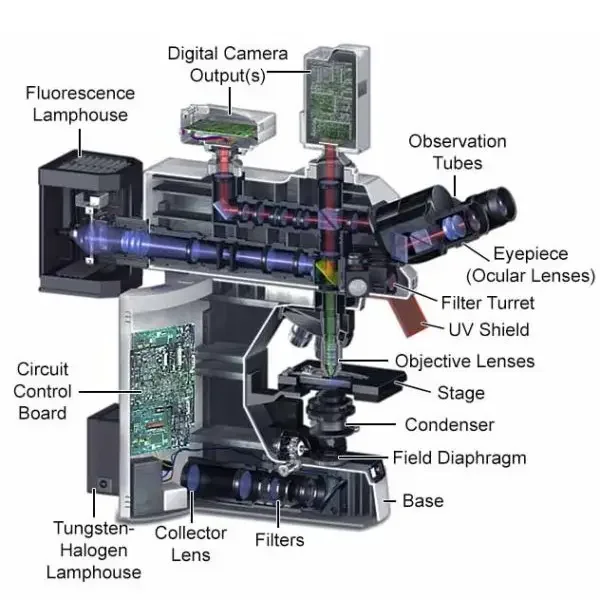
A fluorescence microscope is comprised of:
- Light Source- the element that generates the excitation light which stimulates the fluorescent particles within the specimen. The more typical illumination sources found in fluorescence microscopes are high-intensity lamps (mercury-vapor lamp, xenon arc lamp), lasers, and high-intensity LEDs.
- Excitation Filter- This filtering element selects the precise wavelength of light required to produce fluorescence to stimulate the fluorescent tags.
- Dichroic Mirror (Beamsplitter)- A specialized mirror reflecting excitation light directed back to the specimen yet allows emission fluoresced light access to the imaging device.
- Objective Lens – Captures both excitation light received by the specimen and fluoresced emitted light given off by the specimen, thus factoring into the composite image.
- Emission Filter– Located between the dichroic mirror and the emission viewer (observer), it allows fluoresced emitted light of certain wavelengths only to pass through while filtering out any superfluous excitation light.
- Detector- Accepts the given off fluorescent light for image formation. Detectors are typical eyepieces for viewing and digital cameras for imaging.
Sample Preparation for Fluorescence Microscope
There is a general sample preparation procedure for fluorescence microscopy, which can be modified according to the type of sample and what one intends to view. The general sample preparation involves:
- Fixation. This is when morphology is preserved and localization of structures is preserved. Generally, chemical fixatives are applied—paraformaldehyde or glutaraldehyde—which cross-link proteins to preserve the spatially arranged features of that cell type. Fixation is necessary to preserve the sample for proper treatment and subsequent imaging.
- Permeabilization—Another aspect after fixation is permeabilization of the cells so that the now previously inaccessible intracellular antigens can be rendered available to fluorescent probes or antibodies. Detergents like Triton X-100 or saponin permeabilize the cells by effectively punching holes in the membrane of the cell while still maintaining its overall structure.
- Blocking—Another necessary component to successful immunohistochemistry is the necessity of a blocking step to reduce non-specific binding of fluorescent probes or antibodies. A blocking solution of a cocktail of proteins is generated and applied to the samples. Nonspecific fluorescence is reduced with many proteins such as bovine serum albumin (BSA) while specific binding of the staining is increased.
- Staining/Labeling- The specimen is stained/labelled with fluorescent dyes or antibodies that stick to the molecules or structures of interest. This can be a direct label (primary antibodies conjugated to fluorophores) or indirect (primary antibodies for the antigen of interest and secondary labelled antibodies) based on what’s needed for the experiment.
- Mounting- The mounting happens at the very end when the specimen is placed on a slide with a mounting medium that usually contains antifade agents to preserve the fluorescence. A coverslip is added for protection and to facilitate the correct viewing optics.
Light Path In Fluorescence Microscopy
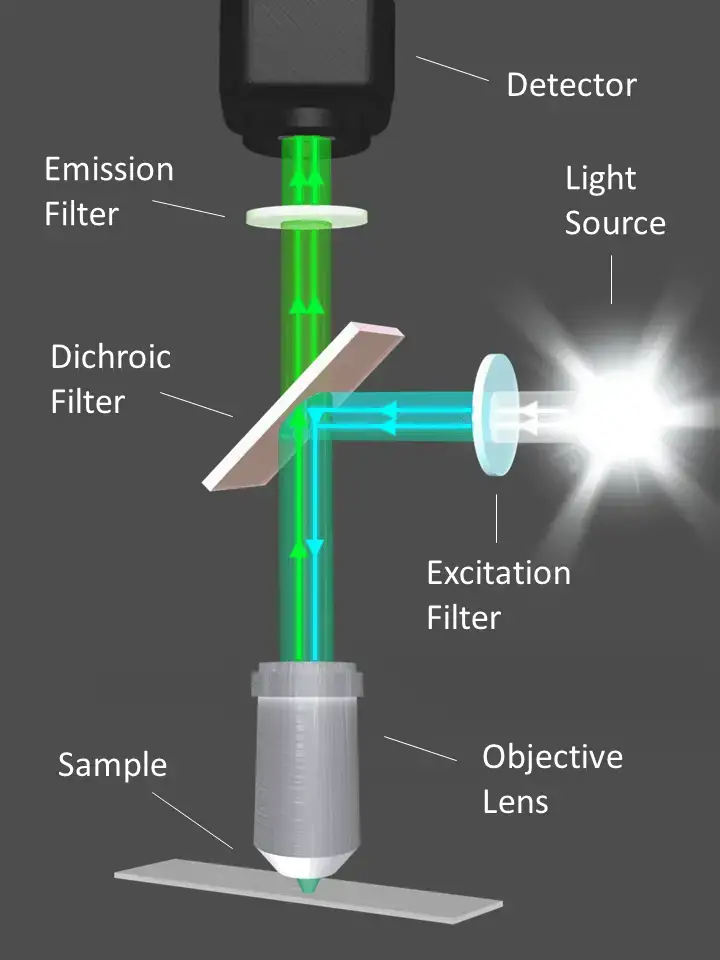
- First, the light source for the microscope is a high-intensity mercury lamp. The lamp generates white light in the visible spectrum.
- Second, an exciter filter is used to let blue light pass through (filtering out all other wavelengths). Therefore, it creates the excitation light required by the specimen.
- Third, there is a dichroic mirror in the pathway of the light. It reflects blue light downward to the specimen but lets other wavelengths—like that which is emitted from the fluorescent stain—continue on their path.
- Next, the blue light hits the sample, which has been stained with a fluorescent dye. The dye takes in the blue light and fluoresces a different color, often green. The resultant green light travels back up and hits the dichroic mirror, which only accepts that wavelength for passage.
- Next, the emitted light hits the barrier filter. This filter blocks any remaining blue light from escaping and allows the green light to pass through.
- Ultimately, the observer sees the stained areas of the sample glowing green on a black background. The unstained areas are clear since they do not fluoresce.
Types of Fluorescence microscope light source
The light source of a fluorescence microscope is an important component that is responsible for providing the excitation light that is used to excite the fluorophores in the sample.
There are several types of light sources that are commonly used in fluorescence microscopy, including:
- Mercury arc lamps- Mercury arc lamps are one of the most commonly used light sources in fluorescence microscopy. They produce a broad spectrum of light that can be used to excite a wide range of fluorophores. However, they may produce unwanted emissions, which can interfere with fluorescence imaging.
- Metal halide lamps – Metal halide lamps are a newer type of light source that produce a more focused spectrum of light than mercury arc lamps. They are often used to excite specific fluorophores and can provide higher intensity and more stable light output than mercury arc lamps.
- LED light sources– LED (light-emitting diode) light sources are becoming increasingly popular in fluorescence microscopy due to their long lifetimes and low power consumption. They produce a narrow spectrum of light that can be used to excite specific fluorophores and can be easily controlled and modulated for advanced imaging applications.
- Laser light sources- Laser light sources produce a highly focused and coherent beam of light that can be used to excite specific fluorophores. They are often used in advanced imaging techniques, such as superresolution microscopy, that require high-intensity, highly focused light.
Analyzing a Specimen With a Fluorescence Microscope
- First, fluorescence microscopy needs a lot of preparation for the sample. The hardest part is that the structures of interest need to be fluorescent. If they are not, they need to be stained through some specific labeling process, some of which are fluorescent dyes or the incorporation of fluorescent proteins.
- Second, the fluorescent labeling occurs. This can happen in a few ways: Fluorescent stains of biological origin can bind to specific biological molecules. For instance, there are nucleic acid stains like DAPI and Hoechst, and phalloidin binds to actin filaments. In immunofluorescence, antigens are identified by antibodies. The antibody that recognizes the targeted antigen is the primary antibody; the antibody that attaches to the primary is the secondary antibody, which is conjugated to a fluorophore. In live/dead fluorescent protein experiments, fluorescent proteins are utilized through genetic manipulation and subsequently, fluorescence dyeing and coloring is observed. Ultimately, however, a microscope is set up.
- The optics of the microscope need to correspond with the chosen fluorophore. Generally, the dye’s manufacturer supplies details to determine the appropriate filter compatibility and correspondence.
- Next, slide making. Decontaminate the slide and the coverslip to prevent any autofluorescence. Place a drop of the sample on the slide and cover with the coverslip; you’re ready to view the sample.
- Start with low power and focus, adjusting light and position for the best view. Increase magnification as desired, continuing to focus and adjust position for the best view.
- Last, saving images of anything worthwhile. Make sure to title images or at least remember what you have so you can find it later.
- Then there’s photobleaching. Many fluorophores become photobleached from too much excitation light exposure. Some versions are worse than others. The fixes are shorter, more gentle exposures or finding a different dye with better stability. But ultimately, where this happens is a good thing. Some forms of analysis—FRAP (fluorescence recovery after photobleaching), for instance—need a region of interest to be photobleached so the fluorescence recovery can assess diffusion rates of fluorophores in that region.
Care of a Fluorescence Microscope
- Always turn off the microscope after use.
- Clean lenses with a soft, lint-free cloth.
- Use a blower brush to remove dust.
- Apply immersion oil only to the 100x objective.
- Remove oil promptly to prevent residue.
- Cover the microscope when not in use.
- Store in a dry, dust-free environment.
- Regularly check and replace light bulbs.
- Lubricate moving parts as recommended.
- Keep the stage clean to avoid interference.
- Inspect the condenser for cleanliness.
- Use lens cleaning solution sparingly.
- Avoid using abrasive materials on lenses.
- Handle the microscope with care to prevent misalignment.
- Refer to the user manual for specific maintenance guidelines.
Application of Fluorescence Microscope
- Used to observe fluorescently labeled samples.
- Helps study cell structures and proteins.
- Enables detection of specific molecules.
- Allows live-cell imaging in real time.
- Provides high-resolution imaging of tissues.
- Used in biological and medical research.
- Enables tracking molecular interactions.
- Helps identify disease biomarkers.
- Can visualize DNA and RNA.
- Enhances study of cellular processes.
- Provides insights into cancer research.
- Used in immunofluorescence techniques.
- Assists in drug discovery and testing.
- Used to analyze gene expression patterns.
- Crucial for environmental monitoring studies.
Advantages of Fluorescence Microscope
- Provides high sensitivity for detecting small quantities.
- Allows real-time observation of live cells.
- Offers high spatial resolution for detailed imaging.
- Enables multi-color imaging of different samples.
- Allows the study of specific molecular targets.
- Helps track dynamic cellular processes over time.
- Minimal sample preparation required for imaging.
- Non-invasive technique preserving sample integrity.
- Allows precise localization of molecules within cells.
- Offers advanced imaging capabilities in 3D.
- Provides clear differentiation of structures in tissues.
- Enables the study of complex molecular interactions.
- Can be used in a wide range of research.
- Increases sensitivity compared to traditional microscopes.
- Versatile tool in both research and clinical settings.
Limitations of Fluorescence Microscope
- Limited by fluorescence signal intensity.
- Fluorescent dyes may photobleach over time.
- Requires special staining techniques.
- Can cause background noise in imaging.
- Imaging can be affected by tissue thickness.
- May require expensive equipment and maintenance.
- Limited by sample penetration depth.
- Fluorescent signals may overlap, causing confusion.
- Can suffer from signal degradation in live cells.
- Requires expertise to interpret complex data.
- Some fluorophores are toxic to cells.
- Sample preparation can sometimes be time-consuming.
- Sensitivity may decrease with complex samples.
- Resolution may not reach atomic scale.
- May not work well with certain samples or conditions.
Fluorescence Microscopy Images
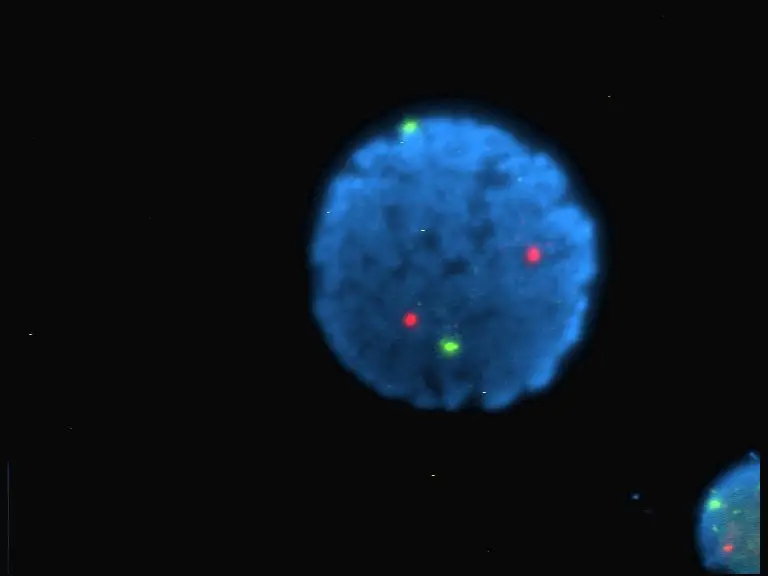


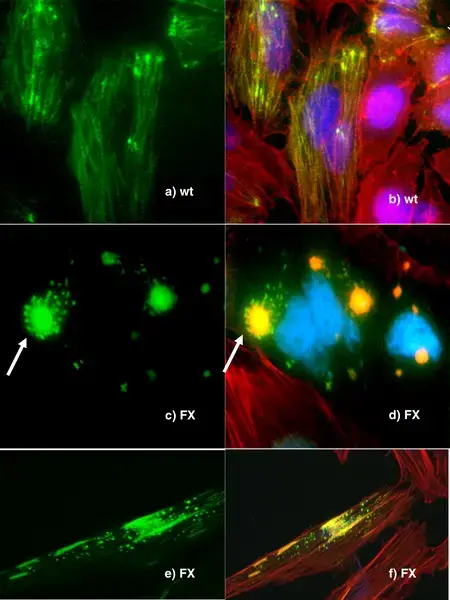
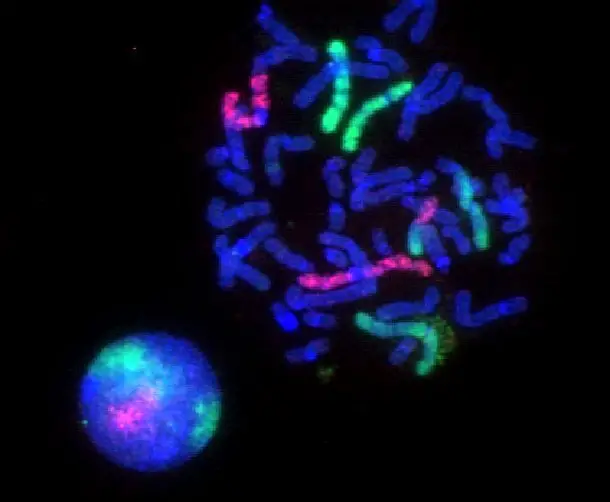
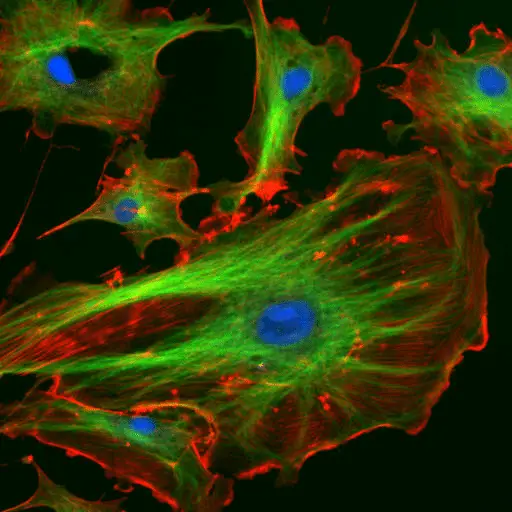
Examples
Zeiss fluorescence microscope
- Zeiss is a well-known manufacturer of high-quality optical instruments, including fluorescence microscopes. Zeiss fluorescence microscopes are widely used in many different fields, including biology, medicine, and materials science.
- Zeiss fluorescence microscopes typically use epifluorescence or total internal reflection fluorescence (TIRF) techniques to visualize fluorescence in samples. They offer high sensitivity and resolution, and can be used to visualize a wide range of fluorophores, including dyes, proteins, and nanoparticles.
- Zeiss fluorescence microscopes are also equipped with advanced features such as automated focusing, high-speed imaging, and multi-channel imaging capabilities, which allow for the simultaneous visualization of multiple fluorophores.
- Zeiss fluorescence microscopes are available in a range of configurations, including upright, inverted, and superresolution models, to suit the needs of different research applications. They are also compatible with a wide range of imaging software and accessories, such as camera systems and stage-mounted incubators, which allow for the acquisition and analysis of high-quality fluorescence images.
Nikon fluorescence microscope
- Nikon is a well-known manufacturer of high-quality optical instruments, including fluorescence microscopes. Nikon fluorescence microscopes are widely used in many different fields, including biology, medicine, and materials science.
- Nikon fluorescence microscopes typically use epifluorescence or total internal reflection fluorescence (TIRF) techniques to visualize fluorescence in samples. They offer high sensitivity and resolution, and can be used to visualize a wide range of fluorophores, including dyes, proteins, and nanoparticles.
- Nikon fluorescence microscopes are also equipped with advanced features such as automated focusing, high-speed imaging, and multi-channel imaging capabilities, which allow for the simultaneous visualization of multiple fluorophores.
- Nikon fluorescence microscopes are available in a range of configurations, including upright, inverted, and superresolution models, to suit the needs of different research applications. They are also compatible with a wide range of imaging software and accessories, such as camera systems and stage-mounted incubators, which allow for the acquisition and analysis of high-quality fluorescence images.
Evos fluorescence microscope
- The EVOS fluorescence microscope is a brand of microscope produced by Thermo Fisher Scientific, a leading manufacturer of scientific instrumentation. The EVOS fluorescence microscope is a versatile, high-performance microscope that is widely used in many different fields, including biology, medicine, and materials science.
- The EVOS fluorescence microscope uses epifluorescence or total internal reflection fluorescence (TIRF) techniques to visualize fluorescence in samples. It offers high sensitivity and resolution, and can be used to visualize a wide range of fluorophores, including dyes, proteins, and nanoparticles.
- The EVOS fluorescence microscope is equipped with advanced features such as automated focusing, high-speed imaging, and multi-channel imaging capabilities, which allow for the simultaneous visualization of multiple fluorophores. It is also compatible with a range of imaging software and accessories, such as camera systems and stage-mounted incubators, which allow for the acquisition and analysis of high-quality fluorescence images.
- Overall, the EVOS fluorescence microscope is a powerful and versatile tool for studying the structure and function of cells, tissues, and molecules at the microscopic level.
Confocal vs Fluorescence Microscopy
| Feature | Fluorescence Microscopy | Confocal Microscopy |
|---|---|---|
| Basic Principle | Uses fluorescent dyes to visualize specific structures. | A specialized form using point illumination and a pinhole to eliminate out-of-focus light. |
| Depth of Field | Larger depth, capturing both in-focus and out-of-focus light. | Shallow depth, captures light from only a specific focal plane for optical sectioning. |
| Resolution | Good resolution but limited by out-of-focus light. | Enhanced resolution and contrast, eliminating out-of-focus light. |
| Applications | Tracks fluorescently labeled structures or molecules in cells. | Best for thicker specimens, 3D reconstructions, and detailed imaging. |
| Complexity and Cost | Simpler and less expensive. | More complex and costly due to added components like pinholes and laser scanning. |
| Sample Damage | Full illumination leads to more photobleaching and photodamage. | Illuminates only the focal plane, reducing photobleaching in out-of-focus regions. |
| Image Processing | Requires post-processing for contrast and blur enhancement. | Produces clearer images with minimal post-processing and enables 3D reconstructions. |
- Sanderson MJ, Smith I, Parker I, Bootman MD. Fluorescence microscopy. Cold Spring Harb Protoc. 2014 Oct 1;2014(10):pdb.top071795. doi: 10.1101/pdb.top071795. PMID: 25275114; PMCID: PMC4711767.
- https://conductscience.com/fluorescence-microscopy/
- https://serc.carleton.edu/microbelife/research_methods/microscopy/fluromic.html
- https://www.thermofisher.com/in/en/home/life-science/cell-analysis/cellular-imaging/evos-cell-imaging-systems.html
- https://microscopeinternational.com/fluorescence-microscopy/
- https://www.microscopyu.com/techniques/fluorescence/introduction-to-fluorescence-microscopy
- https://www.semrock.com/introduction-to-fluorescence-filters.aspx
- https://www.slideshare.net/VIVEKKUMARSINGH109/fluorescence-microscopy-72205439
- https://www.slideshare.net/doctorrao/fluorescent-microscopy
- https://en.wikipedia.org/wiki/Fluorescence_microscope
- http://www.scholarpedia.org/article/Fluorescent_proteins
- https://pubmed.ncbi.nlm.nih.gov/18228363/
- https://www.ncbi.nlm.nih.gov/pmc/articles/PMC4711767/
- Text Highlighting: Select any text in the post content to highlight it
- Text Annotation: Select text and add comments with annotations
- Comment Management: Edit or delete your own comments
- Highlight Management: Remove your own highlights
How to use: Simply select any text in the post content above, and you'll see annotation options. Login here or create an account to get started.