Pond Water and Microorganisms
Pond water is a fascinating ecosystem teeming with life, both visible and invisible to the naked eye. It encompasses a wide range of microorganisms, which are crucial to the balance and health of this aquatic environment. These tiny organisms contribute to various ecological processes, making the study of pond water a captivating and educational experience.
In a typical pond, students can encounter a diverse array of microorganisms, each playing a unique role in the ecosystem. One of the most abundant groups found in pond water is arthropods. These small invertebrates are easily distinguishable under a microscope due to their jointed legs and exoskeletons. Observing these tiny creatures scurrying around in the water can give students valuable insights into their behavior and ecological significance.
Bacteria are another essential component of pond water. Despite their size, these microscopic single-celled organisms are essential for nutrient cycling and decomposition in the ecosystem. They break down organic matter, releasing nutrients that support the growth of other aquatic life. Under the microscope, bacteria appear as minute, single cells, yet their impact on the entire ecosystem is immense.
Protozoa are fascinating microorganisms found in pond water. These single-celled creatures are often visible under a microscope and display diverse shapes and movement patterns. Students can observe their intricate behaviors, such as hunting and feeding, providing a glimpse into the complex interactions between microorganisms in the pond ecosystem.
Hydras, too, find their home in pond water. These tiny, tentacled creatures belong to the phylum Cnidaria and are relatives of jellyfish and corals. Despite their simple structure, they exhibit unique characteristics, such as their ability to regenerate, which makes them captivating subjects for study under the microscope.
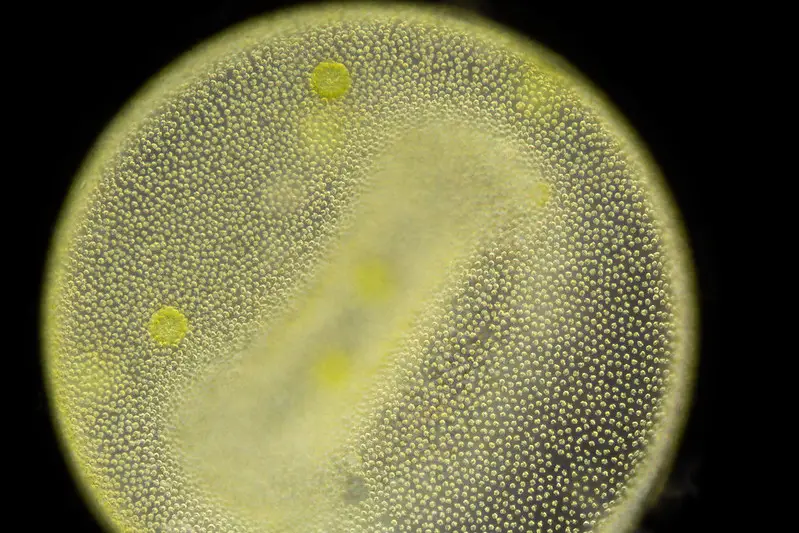
Perhaps one of the most visually striking microorganisms in pond water is algae. These photosynthetic organisms come in various shapes and sizes, ranging from microscopic unicellular species to larger, more complex multicellular forms. Algae play a crucial role in producing oxygen and serving as a primary food source for other aquatic creatures. Their vibrant colors and intricate structures make them a delight to explore under the lens.
While some microorganisms are relatively easy to identify based on their movement and characteristics, others can pose a challenge to students. Protists, for example, are a diverse group of microorganisms that may resemble plants or fungi but are neither. These single-celled organisms can be found in various wet environments, including ponds and fish pools. Identifying and understanding these enigmatic creatures can be an exciting yet perplexing endeavor for budding scientists.
Studying pond water and its microorganisms not only offers valuable insights into the complexity of ecosystems but also serves as a reminder of the interconnectedness of all living things. From the tiniest bacteria to the more conspicuous arthropods and algae, every microorganism contributes to the delicate balance of pond life. Through this exploration, students can develop a deeper appreciation for the natural world and the wonders that exist beyond what meets the eye.
Materials Required
- A jar of pond water: The first and most crucial material is, of course, a sample of pond water itself. This can be collected from a nearby pond, ensuring that the water is relatively clear and not heavily contaminated. The sample should be collected in a clean, sterile jar to preserve the natural composition of microorganisms.
- Microscopic glass slides: Microscope slides are small, flat pieces of glass used to hold specimens for examination under the microscope. These slides provide a stable platform for mounting a tiny drop of pond water, allowing it to be positioned and observed easily.
- Droppers: Droppers, also known as pipettes, are used to transfer and dispense small amounts of liquids. They are instrumental in placing a tiny droplet of pond water onto the microscope slide without causing disturbances or damaging delicate microorganisms.
- Microscope: The microscope itself is the primary tool for observing and magnifying the microorganisms present in the pond water sample. A compound light microscope is commonly used for this purpose, enabling scientists to view the intricate details of microorganisms at higher magnifications.
- Microscopic cover slips: Cover slips, also known as cover glasses, are thin, transparent pieces of glass that are placed over the pond water droplet on the microscope slide. They serve to flatten the sample, prevent evaporation, and protect both the microscope lens and the specimen.
- Blotting paper/Tissue paper: Blotting paper or tissue paper is used to remove excess water from the slide before placing the cover slip. This step is essential to ensure that the sample is not too diluted, allowing for better visibility and clearer observation.
Collecting Pond Water for Observation
To embark on the captivating journey of observing pond water under a microscope, one must first select the right pond and choose an appropriate sampling spot. Here are some essential guidelines to follow when collecting pond water for observation:
- Choose the right pond: Ensure that the body of water you choose is suitable for collection. Avoid federal and state parks, and instead opt for a town park where collection is permitted or a private pond to which you have access.
- Prioritize safety: Safety should be a top priority, especially when involving children and teenagers. Take necessary precautions to prevent accidental falls or unauthorized swimming and wading in areas not designated for these activities.
- Look for still water: Still water is preferable as it tends to yield more microscopic aquatic life than running water. While observing organisms in running water is not impossible, for the purpose of quick success in demonstrating science, it is best to go for areas with a higher likelihood of finding microorganisms.
- Sample the edge of the pond: The edge of the pond, where plant life, including algae, thrives, is an ideal spot for sampling. This area often hosts a rich diversity of microorganisms, making it a valuable location for observation.
- Collect water, mud, and plant life: Use collection vials to scoop up samples of water, mud, and plant life from the pond. The vials allow you to secure the samples with lids, preventing spillage and contamination.
As you choose where to sample, engage your students in critical thinking by asking questions. Discuss where the best spot for sampling might be – is it the clear water in the center of the pond or the murkier edges? Consider how the time of year might affect the sample and ponder where protists might go during the winter.
To enhance the learning experience, take more than one sample from various locations at the pond. This enables students to compare each sample and observe the differences in microorganisms between different areas of the pond.
With your samples collected, it’s time to prepare them for viewing under the light microscope. The preparation process involves carefully placing a small drop of each sample on a clean microscopic slide and covering it with a cover slip. Once prepared, the slides are ready to reveal the hidden world of microscopic aquatic life thriving in the pond.
Collecting pond water for observation opens a door to an enchanting realm, where students can witness the richness and complexity of the unseen microcosms that shape our natural world. By fostering curiosity and encouraging hands-on exploration, this activity not only cultivates a deeper appreciation for the wonders of nature but also nurtures the scientists of tomorrow.
Pond Water Preparation
The preparation of pond water for microscopic observation is a crucial step in uncovering the hidden microorganisms that thrive within this fascinating aquatic habitat. By following a few simple steps, researchers, students, and enthusiasts can ensure a well-prepared slide, allowing for clear and insightful observations of the diverse microcosm within pond water.
- Gently stir the water sample: Before beginning the preparation process, gently stir the jar containing the pond water sample. This ensures a uniform distribution of microorganisms in the water, as some may have settled at the bottom or gathered near the surface.
- Place drops of pond water on a microscopic slide: Using a dropper, carefully extract two or three drops of pond water from the jar. Place these droplets at the center of a clean and sterile microscopic slide. The choice of a clean slide is crucial to avoid any contamination that could interfere with the observation.
- Add the cover slip with care: Taking a clean and sterile cover slip, position it on top of the water droplet. To avoid trapping air bubbles, place one edge of the cover slip at a 45-degree angle to the slide and gently lower it onto the water. This method allows for even spreading of the water sample, ensuring that the microorganisms are well-distributed across the slide.
- Absorb excess water: After placing the cover slip, use a piece of blotting paper or tissue paper to touch one side of the slide gently. This step absorbs any excess water that might be present, which could hinder the clarity of observation or create distortions in the sample.
- Ready for microscopic observation: The prepared slide is now ready to be placed on the microscope stage. Handle the slide with care to avoid any disturbances to the water sample. Once the slide is secured on the stage, it is time to explore the microscopic wonders hidden within the pond water.
And For Algae
Preparing a microscopic slide for algae observation requires precision and attention to detail to ensure accurate and insightful results. The following steps outline the process for slide preparation and observation of algae under the microscope.
- Sterilize glass slides: To ensure the slides are free from any contaminants that might interfere with the observation, sterilize them using an autoclave. Place the glass slides in the autoclave at 121°C and 15 atmospheres of pressure. This high-temperature and high-pressure environment effectively sterilizes the slides, making them suitable for holding the algae sample.
- Dry the slides: After sterilization, remove the slides from the autoclave and allow them to dry in an oven. The oven temperature should be set at 105°C, and the drying process typically takes 15 to 30 minutes. Drying the slides thoroughly is essential to prevent any moisture from affecting the algae sample or causing condensation during observation.
- Apply the algae sample: Once the slides are dry, carefully place a small amount of algae in the middle of the slide using a dropper. Algae can be obtained from a water source, such as a pond or an aquarium. The dropper ensures controlled and precise application of the sample, preventing excessive spreading or overlapping.
- Cover the sample: After placing the algae on the slide, gently position a glass cover slip on top of the sample. This cover slip helps to flatten and secure the algae in place for better observation under the microscope. It also prevents the sample from drying out during the observation process.
- Observe under the microscope: The prepared slide is now ready for microscopic observation. Place the slide on the microscope stage and adjust the focus and magnification settings to obtain clear and detailed views of the algae. Explore the diverse structures, shapes, and colors of the algae, revealing the intricate beauty of these microscopic organisms.
- Record observations and measurements: During the observation, carefully note down any significant features or characteristics of the algae. Additionally, to quantify the sample’s growth or changes, measure the difference between the initial and final weight of the algae sample. The recorded difference should be less than 4 units, indicating minimal evaporation or other factors affecting the accuracy of the observation.
How to Prepare a hanging drop slide?
A hanging drop slide is a useful technique for observing live microorganisms under a microscope. Follow these steps to prepare a hanging drop slide for a closer look at the fascinating world of pond water microorganisms:
- Gather the necessary materials: You will need two clean microscope slides for this preparation.
- Attach blu tack to one slide: Take one of the microscope slides and attach two small pieces of blu tack, approximately 3 cm apart, on its surface. The blu tack will create a bridge that keeps a gap between the two slides.
- Resuspend the microorganisms: Ensure the lid of your pond water sample is securely tightened, then gently shake or swirl the sample to re-suspend any microorganisms that may have settled at the bottom.
- Collect a small sample: Using a plastic dropper, draw up a small amount of the re-suspended pond water sample. Be cautious not to take more than 1 ml of the sample.
- Place the drop of sample on a slide: Take the other microscope slide (the one without blu tack) and position the tip of the dropper over its center. Carefully place a drop of the pond water sample onto the center of the slide.
- Sandwich the slides together: Take the slide with the blu tack attached and position it on top of the slide with the pond water sample, blu tack side down. Gently push the slides together, ensuring they are aligned and leaving a gap between them. Handle the slides with care, as they are made of glass and too much pressure could cause breakage.
- Create the hanging drop: Quickly and carefully turn the slides over so that the drop of sample is hanging from the top slide, suspended into the gap between the two slides. The blu tack will keep the slides separated, allowing the sample to hang.
- Ready for microscopic observation: Your hanging drop slide is now ready for viewing under the microscope. Place the slide on the microscope stage and use the appropriate magnification to observe the live microorganisms in their natural state.
Instruction for Observation under the microscope
- Turn on the microscope and adjust the light: Start by turning on the microscope and checking that the light source is properly illuminated using the light dial. Adequate lighting is crucial for clear and detailed observations.
- Choose the appropriate objective lens: Microscopes typically come with several objective lenses, such as 4X, 10X, and 40X. Begin by positioning the 4X lens above the viewing platform. This low magnification setting helps locate and focus on the sample easily.
- Place the slide: Carefully place the prepared slide with a drop of pond water in the center of the viewing platform. Ensure the sample is secure and well-centered for optimal observation.
- Focus on the pond water: While looking down the microscope, use the large focus knob on the side of the microscope to bring the pond water into focus. At this low magnification (4X), larger microorganisms may be visible, but finer details may not be clear yet.
- Switch to higher magnification: Now that you have focused the microscope using the 4X lens, it’s time to switch to higher magnification. Turn the objective lens to 10X, positioning it above the sample.
- Fine-tune the focus: With the 10X objective lens in place, you may notice that the sample is slightly out of focus. Use the small focus knob (not the large focus knob) to make delicate adjustments until the sample comes into clearer focus. At this magnification (10X from the eyepiece and 10X from the objective lens = 100X total), microorganisms like protozoa and algae should be visible in greater detail.
Important note: Avoid using the 40X objective lens when using a hanging-drop slide. The height of the slide may cause the objective to touch the slide, risking damage to the lens.
As you explore pond water under the microscope, take the time to observe and appreciate the diverse forms of life thriving in this tiny ecosystem. Protozoa, algae, and other microorganisms may showcase intricate behaviors and structures that reveal the wonders of nature at the microscopic level.
Remember to take notes and capture images of the microorganisms you observe, as this information will contribute to your understanding of pond ecosystems and the vital role these microorganisms play in maintaining ecological balance. By carefully following these steps, you can embark on an enriching scientific journey, where the unseen world of pond water microorganisms becomes a source of fascination and knowledge.
Basic Observations
In the captivating journey of exploring the microscopic world, students begin with basic observations using a microscope. With the microscope set to low power, students are presented with a unique opportunity to encounter a diverse array of microorganisms hailing from both the plant and animal kingdoms.
The primary goal of this experiment is not only to learn the names and life cycles of these microorganisms but also to foster curiosity and engagement by encouraging students to identify and differentiate them. As students peer through the lens of the microscope, they are introduced to a mesmerizing realm of tiny creatures that are often hidden from the naked eye.
To start the observation process, students can compare what they see under the microscope with images provided on the blackboard or from reference books. By comparing and contrasting the features of the microorganisms, they can begin to distinguish those belonging to the animal kingdom from those belonging to the plant kingdom. This simple exercise lays the foundation for a deeper understanding of the diversity of life and the intricate relationships between various organisms.
As students delve into this microscopic exploration, they may encounter a plethora of microorganisms, including bacteria, protozoa, algae, and other tiny creatures. Each of these organisms plays a significant role in their respective ecosystems, contributing to nutrient cycling, decomposition, and food webs. Understanding the distinctions between plant-like and animal-like microorganisms sets the stage for more advanced studies in biology and ecology.
Through this basic observation exercise, students cultivate critical thinking skills as they identify and categorize these minute beings. They also develop a sense of wonder and appreciation for the natural world, as they come face to face with the hidden complexity that thrives all around us, often unnoticed.
As students progress from low power to higher magnifications, their fascination and curiosity are likely to grow exponentially. They may even become inspired to conduct further research and investigations, exploring the life cycles, behaviors, and ecological roles of these microorganisms in more depth.
Basic observations using a microscope serve as a fundamental stepping stone in the world of science education. By nurturing the students’ curiosity and observational skills, this exercise lays the groundwork for a lifelong appreciation of the natural world and the tiny yet vital creatures that inhabit it. Whether aspiring scientists or simply curious minds, students embark on a journey of exploration that instills in them a sense of wonder and the desire to unravel the mysteries of the microscopic universe.
FOR ALGAE
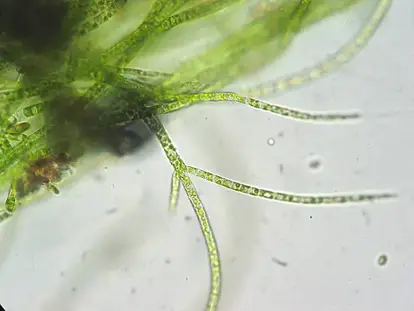
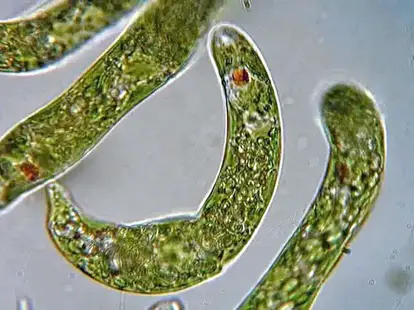
Algae, these remarkable eukaryotic organisms, captivate our attention with their unique characteristics. Unlike traditional plants, algae lack roots, stems, and leaves, yet they possess chlorophyll and various pigments that enable them to carry out photosynthesis. This fascinating process empowers them to convert sunlight into energy, shaping the aquatic ecosystems they inhabit.
As we observe algae under the microscope, we enter a world of awe-inspiring unicellular organisms. Among the diverse types of algae, the unicellular forms are particularly abundant, often found in various bodies of water, especially in plankton. Planktonic algae play a crucial role in aquatic food chains, serving as a primary food source for many aquatic organisms.
The microscope reveals the intricate beauty of these unicellular algae. Students have the opportunity to witness the diverse shapes and sizes of these tiny organisms. Some appear spherical, while others exhibit elongated or branched structures. The presence of chlorophyll and other pigments brings forth a spectrum of colors, from vivid greens to reds and browns, as each type of algae adapts to its specific environment.
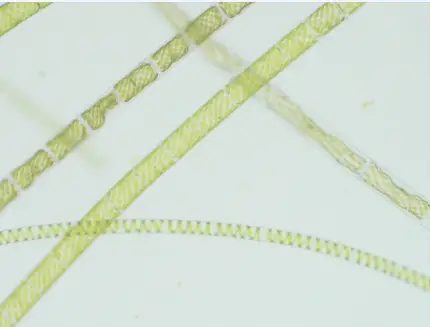
In this microscopic realm, students can also observe the remarkable adaptations that allow algae to thrive in different aquatic habitats. Some algae exhibit unique motility mechanisms, such as flagella or cilia, which enable them to move through the water in search of light and nutrients. Others form colonies or filaments, creating fascinating patterns and structures that contribute to the rich biodiversity of the aquatic world.
As we delve deeper into the world of algae, we recognize their ecological significance. They are essential contributors to the balance of aquatic ecosystems. Not only do they play a vital role in oxygen production through photosynthesis, but they also serve as the foundation of food chains, supporting the entire aquatic community.
Observing algae under the microscope sparks curiosity and encourages further exploration. Students may be inspired to investigate the factors influencing algae growth, their responses to changes in environmental conditions, and their interactions with other organisms. Such research holds immense value in understanding the delicate dynamics of aquatic ecosystems and the impact of environmental changes on these microscopic marvels.
Observations of algae, whether in the classroom or in research laboratories, offer a glimpse into the hidden intricacies of life’s diverse forms. From the smallest unicellular algae to the grandest kelp forests, these photosynthetic gems remind us of the profound interconnectedness of all living beings on our planet. As we continue to explore and learn from these microscopic wonders, we gain a deeper appreciation for the beauty and complexity of the natural world that surrounds us.
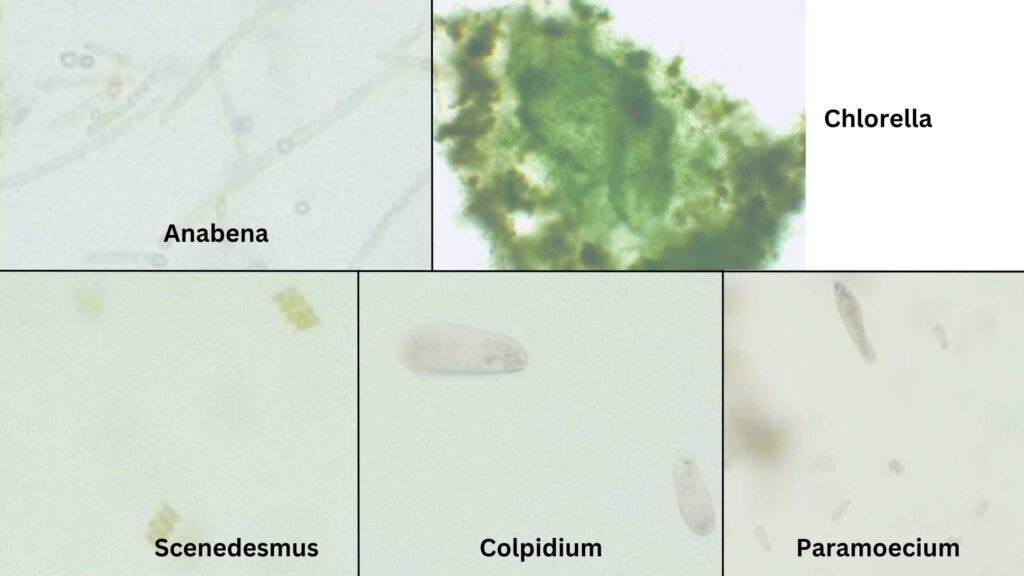
Common microorganisms that you can observe

Microscopic Pond Life Video
FAQ
What is pond water microscopy?
Pond water microscopy is the process of observing and studying microorganisms and tiny aquatic life present in a sample of pond water under a microscope.
What equipment do I need for pond water microscopy?
To perform pond water microscopy, you’ll need a microscope, glass slides, cover slips, a dropper or pipette, and a sample of pond water collected using a sterile container.
Can I use any pond water for microscopy?
It is essential to choose a clean and relatively clear body of water for microscopy. Avoid water from heavily polluted or contaminated sources, as it may interfere with accurate observations.
How do I collect pond water for microscopy?
Collect pond water by using a sterile container and sampling from the edge of the pond where plant life, including algae, is thriving. Take precautions for safety, especially when involving children and teenagers.
What can I expect to see under the microscope?
Pond water microscopy can reveal a diverse array of microorganisms, such as bacteria, protozoa, algae, and even small invertebrates like arthropods. Each offers unique shapes, movements, and behaviors.
How do I prepare a slide for pond water microscopy?
To prepare a slide, place a small drop of pond water on a clean glass slide and cover it with a cover slip. This ensures the sample is secure and ready for observation.
Can I observe living organisms under the microscope?
Yes, you can observe living organisms in the pond water sample. However, be aware that some may be moving rapidly, so it’s essential to use the microscope’s stage controls to keep them in focus.
How do I adjust the microscope for better observations?
Begin with low power and gradually increase the magnification as needed. Use the focus knobs to sharpen the image and adjust the diaphragm or light intensity for optimal lighting conditions.
What should I be looking for during pond water microscopy?
Observe the various shapes, sizes, and movements of the microorganisms. Try to identify different types of algae, protozoa, and other organisms present in the water.
What can I learn from pond water microscopy?
Pond water microscopy offers valuable insights into the diversity and complexity of microscopic life. It helps us understand the roles these organisms play in the pond ecosystem and their significance in nutrient cycling and ecological balance.
References
- https://www.microscopemaster.com/pond-water-microscope.html
- https://blogshewrote.org/observing-pond-life/
- https://www.academia.edu/38071766/OBSERVATION_OF_MICROBES_IN_POND_WATER_ALGAE_Basic_Observations
- https://www.lsu.edu/science/soar/files/life_in_a_drop_of_water_6-12version.pdf
- https://microscope-microscope.org/pond-water-critters-protozoan-guide/
- https://www2.mrc-lmb.cam.ac.uk/microscopes4schools/pondlife.php
- https://rsscience.com/microscopic-organisms-pond-water/
- Text Highlighting: Select any text in the post content to highlight it
- Text Annotation: Select text and add comments with annotations
- Comment Management: Edit or delete your own comments
- Highlight Management: Remove your own highlights
How to use: Simply select any text in the post content above, and you'll see annotation options. Login here or create an account to get started.